Friday 30 November 2012

A Time For Giving

Hi, another Christmas card today. This time I have used an LOTV die cut topper.

Click on image to enlarge picture

This is a terrible picture but I can't seem to do any better with it I'm afraid.

Background papers are HOTP , the sentiment is Little Claire Designs Christmas Sentiments, Spellbinders Lacy Circles and Lacy Squares and Wild Orchid Crafts poinsettias.  I used Glamour Dust on the bunny's outfit and Diamond Dust on the roof  of the bird table. It looks better in real life, but seems a bit dull to me. Ah well, you can't win them all. After I took the picture I realised I had intended to colour the ribbons on the sentiment circle which I have now done and they are red, which lifts that corner a bit.

Well, have a good day - and keep warm!!!

Love from Christine xx

Thursday 29 November 2012

Daisy Chain

Hi blog friends! Sorry I've been missing for a few days. Over the weekend I came down with a virus which really knocked me for a six! A couple of weeks ago I had a sore throat and felt a bit under the weather but that only lasted a day or so then I was absolutely fine. However, I think it hid away in my system and re-emerged last Friday evening - with a vengeance! Over the last couple of days I have been feeling  much better and got cracking on my Christmas cards. They are fairly simple fortunately and I have managed to get about 35 done. Still a long way to go but now I know what I'm doing I can really get my skates on. I actually work better under a bit of pressure!  Yesterday I started on my Christmas shopping. Okay, I know you've probably all just about finished, but hey, I'll get there!  I must confess I was pretty shattered when I got back from Milton Keynes!

Anyway I decided to have a  break from Christmas and make a 40th birthday card for my niece.


I have actually made an A5 card, which I haven't done for ages. I used Spellbinders M-Bossibilties Lovely Lattice for the background and trimmed the bottom edge with Martha Stewart Doily Lace. The main image is Marianne Creatables. The flowers and butterflies are Spellbinders Jewel Flowers & Flourishes with a few little lemon Prima daisies, and the leaves are Spellbinders Foliage. The centres of the large daisies were in my stash - I'm almost sure they were in with a box of Floradoodles that I got years ago.

Well that's it for today. I'd better get back to my Christmas card list!!!

I hope everybody has a good day today!  Love and hugs from Christine xx

Friday 23 November 2012

Accordion Book Box

Hi friends, just a very quick post today after yesterday's marathon.  We went to Birmingham yesterday and by the time we got back, had a meal and cleared away time was marching on and I didn't feel like crafting. So I  just made a very quick box for yesterdays Accordion Box Card. I had to wait until this morning to photograph it, hence the later post today. However, it is so grey here  that it's still not a good picture.

 
Click on image to enlarge pictures.


I kept it quite simple as you can see. I again computer generated the sentiment and die cut it with Marvellous Squares. I threaded through some of the ribbon that I used to close the book, and added a few pearls and small WOC roses.

I also altered the flower arrangement slightly on the front of the book so I took another quick pic.

Well that's me for today. Hope you all have a good day.

Love from Christine x

Thursday 22 November 2012

Christmas Accordion Book

Hi everyone, sorry I've been away for a couple of days. We've been quite busy and I was working on a project which took a little time to sort out  in my head. I saw a similar project being made at the NEC and managed to get the measurements so I was able to create my own. Today's post is very picture-heavy but it's the only way I can do the book/card justice.


Click on image to enlarge pictures.

 Just to show how the accordian resembles the pages of a book
 Showing the spine of the book
 The open book
 Close up of the LOTV image

I computer generated the book title for the front page and diecut it using  Marvellous Squares. I added WOC flowers and Marianne flourishes, with some pearls. I again computer generated the book title for the spine. The small flowers are actually snowflakes from Create a Flake 4 and I added a pearl in the centres. ( I have now adjusted the top pearl - didn't realise it had slipped till I saw the pic!)

Inside - at the left side I made a pocket , decorated the edge with Venetian Accents and used a  Marianne Creatables die as a tag so that  my friend can write her own message inside for her first grand daughter. At the right side I used LOTV Angels With Crib stamp,  coloured with promarkers and added lots of glitter - which doesn't show in the picture. I again used Venetian Accents to make a frame . The book is fastened with pink organza ribbon. It was so dark all day that not only did I need to use flash,  I also needed the overhead lights on. I ended up taking the photographs in the kitchen because it was the least shadowy there.

 I have yet to make the box, but I'll save that for another day in case you've all fallen asleep! Sorry this has been such  a long post!!!

Well I hope today is better than yesterday. It poured with rain all night and all day and the road was quite badly flooded yesterday when John drove to the next village to see his GP.

Have a good day everyone! Love and hugs from Christine xx

Monday 19 November 2012

Gift Bag and Roses

Hi friends.  Well, I'm sure Patricia will be pleased to know that I have actually made the gift bag and roses from her tutorials.


Click on image to enlarge pictures.


Side view

I used Grand Labels 11 which I got at the NEC and the double side card is Isabelle from First Edition. I folded the side gussets so that I could hold the handles together better with the ribbon, but the picture doesn't really show it.  My mistake is that I don't think I made the holes for the handles big enough, though it's not the end of the world..

But I hope you've checked out my roses!!!!!! I used the same card to make the roses and I diecut the leaves in white from Spellbinders Foliage and used a Ranger ink pad called "Seashells - Starfish Green" which I have had for ever, and it is a brilliant match. The  roses aren't brilliant but I'm quite pleased with them and I can only get better. Anyway - thank you Patricia!!  I'm not keen on the ribbon but it's all I had that would tone (apart from white and I didn't want to use white) but I' ll have a look next time I go to town for something different..

Anyway, I'm rather pleased with my first gift bag, and I can assure you that it certainly won't be the last. I love to make boxes, bags etc. It makes a nice change from cards.

The link is HERE

Well I hope you all have a great day. 

With love from Christine xx

Sunday 18 November 2012

Hanging Star

Good morning blog friends.  Today I have a very simple hanging star to show you which was made from only two pieces of 6x6 card,  plus the embellishments.


Click on image to enlarge pictures

Back of star

I found the simple tutorial  HERE if you are interested.

I used Spellbinders standard circles and lacy circles for the centre. I used a large, bought poinsettia but I pulled it apart and covered it in red rose glitter - I didn't have any true red, but it doesn't look too bad. I disposed of the yellow centre and replaced it with a small rose, both flowers from WOC. I just used some narrow red  to form a hanging  loop.  The joins at the back don't fully meet and  I didn't like the white strip that showed  so I used peel off borders to cover each edge. This way if it was hanging from the Christmas tree and swung round it would still look quite neat from behind. Easy peasy!

Hope your weekend is going well. 

With love from Christine xx


Friday 16 November 2012

Joy To The World

Good morning blog friends. Todays card is another LOTV image called the Little Trumpet.  Sorry for so many Christmas cards but I really have so many to do that I'm trying to forge ahead.


Click on image to enlarge picture

This is a simple little image and easily coloured.  I'm not sure what happened to the lighting on the picture but the skin tone in real life does not look as dark as it does in the picture. I used Spellbinders standard circles to cut the image and petite scalloped circles to diecut the matt from lilac Bazill Basics. The backing papers are once again Papermania Contemporary Christmas. I really like these, and best of all I am using up a lot of my old stash which has got to be good.  The lilac and greys tone so well that I coloured the angel's robe with cool greys and lavender.  The corners are from the Marvellous Squares set. I computer generated the sentiment and a  few purple Papermania Shimmer dots finished  it off.

Well I hope you have a good day today.

Love from Christine xx


Wednesday 14 November 2012

Festive Robins

Good morning friends. Today's card is an LOTV die cut.

Click on image to enlarge picture

The grey backing papers were pieces from my bits box and I'm sure they are Papermania's Contemporary Christmas. Everything was matted onto red cardstock. The sentiment is from Little Claires Christmas Sentiments and matted onto a red Spellbinders Lacy Circle. Some poinsettias and a few gems finished off a quick and easy card. It was late by the time I got round to taking a picture so it's rather shadowy I'm afraid.  If I get chance I will take another picture and then edit it .

Here is the template for the exploding cracker from yesterday's post.


My writing is atrocious so I hope you can read the measurements. I think if you click on the image and then  open the link in a new tab you can  save the picture and then print it off. If that doesn't work then I can always email it to you. The two base squares are for added strength if you need it. I've sometimes used the layering templates but not often.This was in the days before all these lovely Spellbinders were available. If anybody knows of an easy way of adding something like this I would be grateful for the advice.

Well that's me for today. Hope you all have a good day.

With love from Christine xx


Tuesday 13 November 2012

Exploding Cracker

Good morning.  Thank you everybody for all your birthday wishes. I was quite touched. (John has always said that!)  I really don't know what has happened to 2012, it seems to have come, and almost gone, so quickly!

I didn't have a great deal of crafting time yesterday so I just did a quickie. A little while ago when I was having a clear out I came upon this template that I haven't used for a very long time.


Click on image to enlarge pictures


I tried to take a picture of the open cracker but it was almost impossible to take a decent picture, so I scrubbed it. It doesn't take much imagination to see how it would fall open when the ribbon is removed. I obviously used much stiffer card the last time I made these because the sides didn't gape so much then. I wanted to use  double sided cardstock so I didn't need to decorate the inside but it was obviously  too thin.

I stamped the little angel with Versacolour Petal Pink pigment ink and embossed it with WOW Clear Sparkle then mounted her on the second size Spellbinders Floral Ovals. On the other sides I  put a diecut stacker tree from Dees Distinctly A Cut Above dies, and added some glitter to them. Inside I just put some choccies but a little gift could be substituted.

If anybody wants the template I can pop it on the blog for you.  I might do another one of these next week and do a  better job of it.

Hope you all have a good day.

With love from Christine xx

Monday 12 November 2012

Celebrate

Good  morning friends and thank you for visiting. Well, today I am officially  older! Yes today is my birthday and so we will be going out for lunch later. I made a card yesterday and then  spent some time playing around with some of my new stash I bought at the NEC

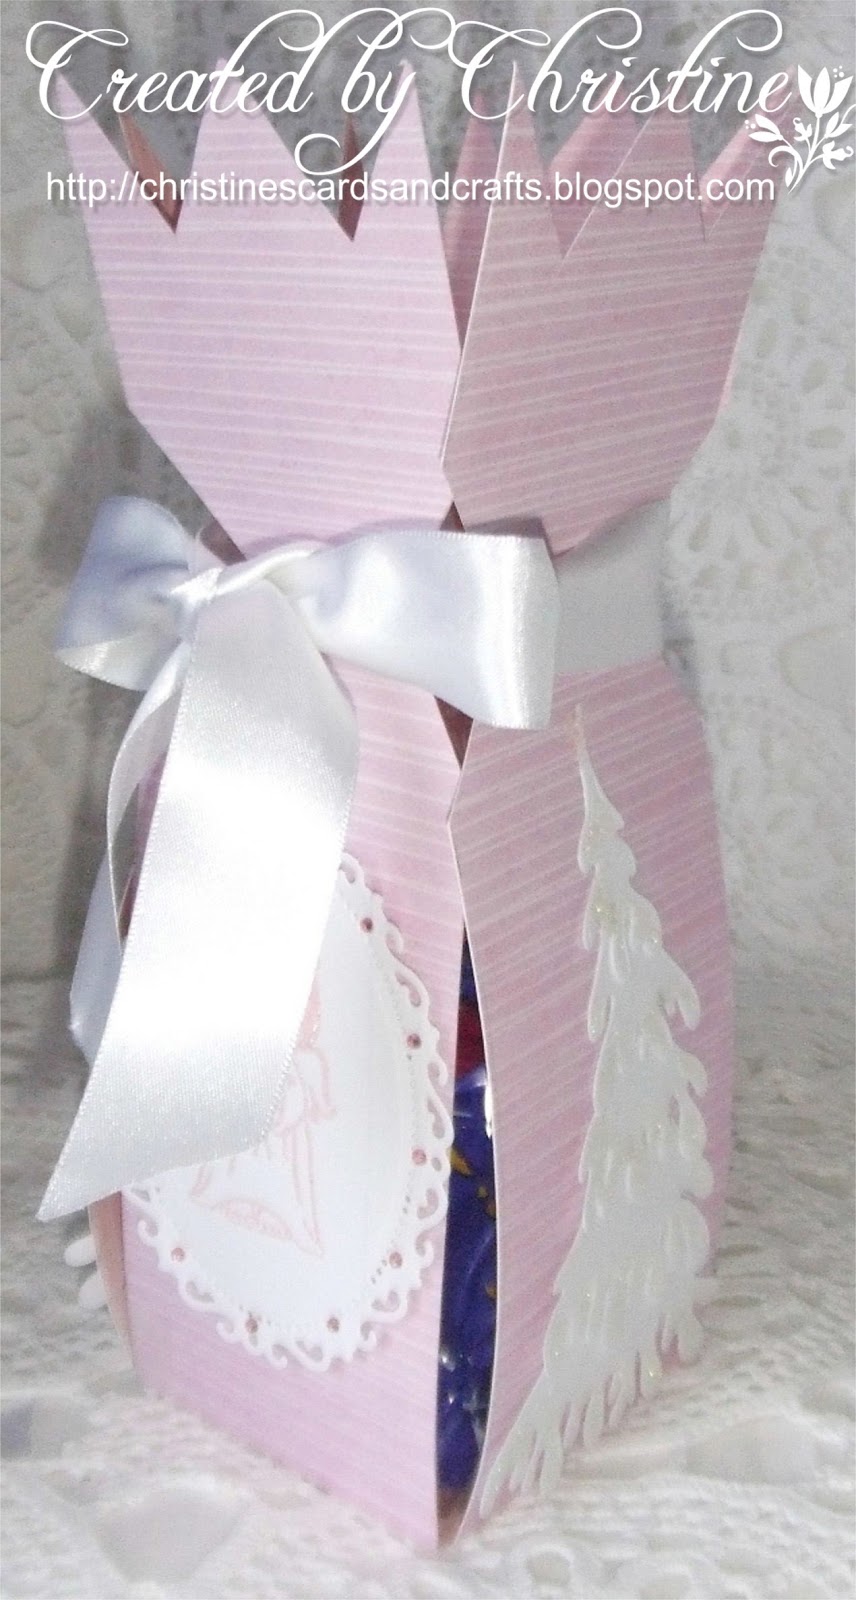
 I used a Cheery Lynn die cut to make my card. This die isn't actually new, I got it last year to use on the wedding album I did for my sister and I haven't used it since. I saw somebody using a Cheery Lynne die in a demo and though the die was nothing like this one, and the card they made was nothing like this, it just brought it to my mind and so I got  it out and used it. Strange how the mind works.


Click on image to enlarge pictures

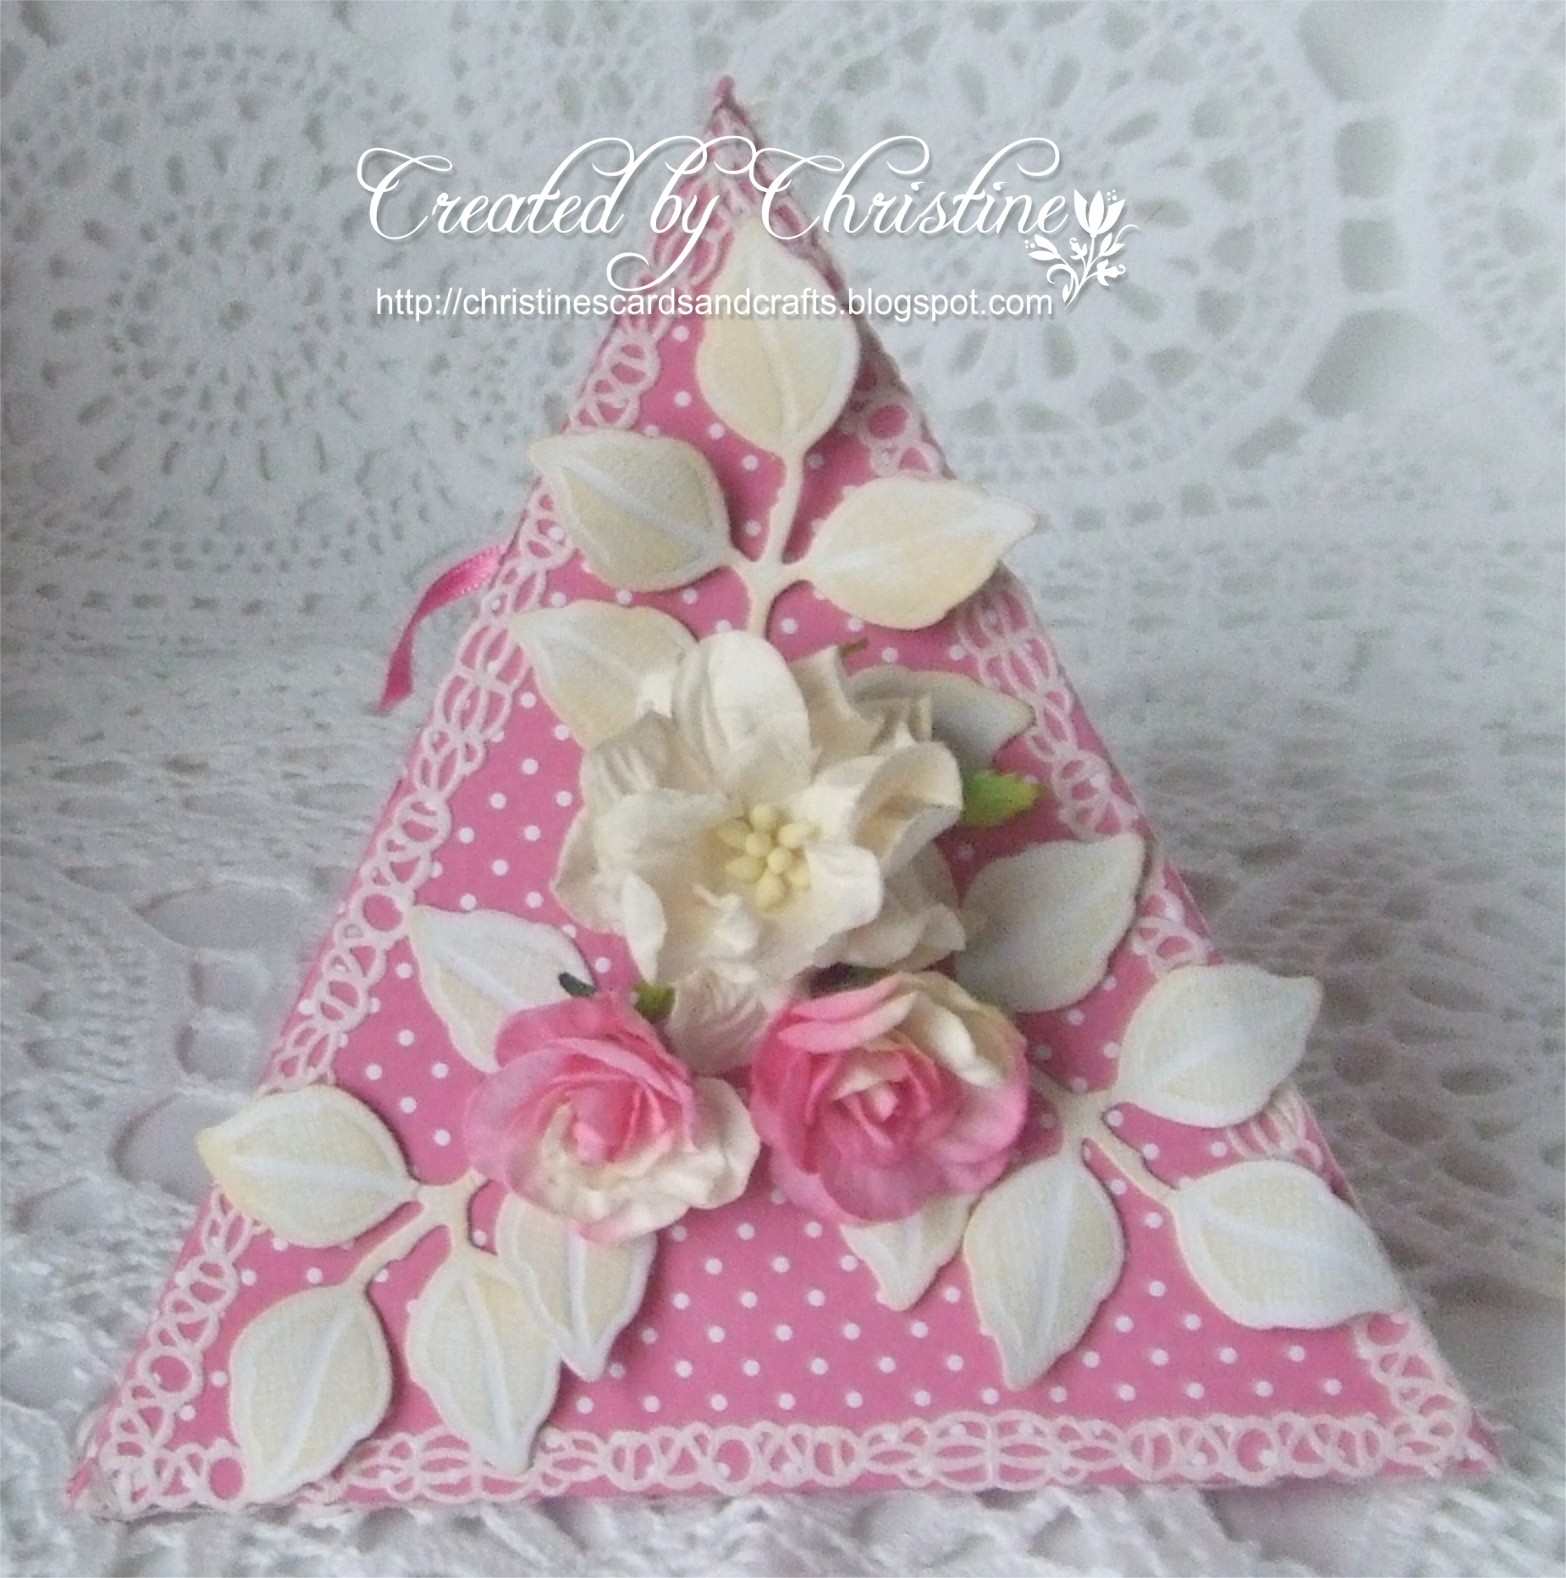
The die is Victorian Romance Flourish and I cut it three times. I cut the third one in half and removed the centre. The heart shape  in the centreis just two bits of the waste as they came out of the die. I used the smallest of the Resplendant Rectangles to die cut a label for the easel stopper and used a rub on that says Celebrate, but that doesn't show in the picture at all. I finished off with a few gems.

I then decided to try out the moulds and WOW Melt It powder that I bought. No, they are not sweeties, even though they do look a little like goodies!


These are the daisy and rose moulds I used.


For the pink ones I mixed Rich Ruby Red embossing powder with the Melt It. I can see I need  to use a much higher ratio of coloured embossing powder to achieve a deeper colour. But it's all trial and error, and I have never done this before. The others were made using WOW platinum powder which gives a sort of taupe colour. The beauty of this is that if you don't like it, or the flower is not as good a shape as you would like, then you can just melt it down and try again. I  did do that just to see if it worked - it does! I only wish now that I had bought some more moulds because this really is a lot of fun.

Well that's all for today. I hope you all have a good day!

With love from Christine xx

Saturday 10 November 2012

Keep Climbing

Good morning friends

First of all let me say that this card is not original. I got this set of stamps, Keep Climbing, from Our Daily Bread Designs last month and at the time I  went onto their website and saw a few cards using these stamps. I needed to do something fairly quickly today because I wanted to get it into the post and I remembered this  card so mine is almost a copy, with some changes of stamps and dies. This card is for a dear friend who is going through a very rough time right now.

Click on image to enlarge picture.


The dark green card is from my stash and I stamped the images and sentiments onto green mottled paper, also from my stash. The  verse of scripture is mounted onto one of the dies from Resplendant Rectangles.
The mountains and sentiment are from the ODBD set, and the floral images and butterfly are from a Stampendous set I bought yesterday called Wildflower Sprigs.

I have been playing with some of the stuff I bought yesterday which has been quite fun so I'm sure I will be able to incorporate something into a card soon.

Well I hope you all have a good start to the weekend.

With love from Christine xx

Friday 9 November 2012

NEC Goodies

Hi Blog Friends


Here is my new stash.  As you can see I got a Grand Nestabilities, so I can see one of Patricia's bags coming up! Just realised I misssed a set of stamps off  the picture. The Marianne die had been on my wish list for a while and so I finally succombed, along with a couple of Memory Box dies too. What the heck, it's my birthday in a couple of days so now I've got my birthday present !! - and possibly Christmas present too? Unless John is feeling generous again next month!

Well I'm hoping to play with some of my goodies today so maybe I'll have something to post tomorrow, depending how things go.

Hope you all have a great day!

Love fom Christine xx

Thursday 8 November 2012

Monochrome

Hi everybody.

A simple card today which I am not pleased with. I almost didn't post it but then decided that we can all make mistakes can't we? My lovely dad used to say "Even (Sir) Stanley Matthews had his  off days!" - a football fan as you will have gathered!


Click on image to enlarge picture

The papers once again were very old stock which I bought some years ago from a craft shop which was closing down. At least I am continuing to use old stash when I can. I matted the plaid paper onto the base card, matted the spotted paper onto plain and then cut them  into pennant shapes, after computer generating the sentiment. The stamp is one I won from Ladybug Crafts last month and I stamped it with an Anna Griffin green pigment ink then used a brush to fill in the background so it wasn't stark white. I think maybe this is what I don't like about it because I'm not good at it.

Anyway, for better or worse it's here.

Today I am off to the NEC and hopefully not spending too much money! ROFL!

Have a good day. Love from Christine xx

Tuesday 6 November 2012

Love Came Down

Good morning fellow bloggers. For today's card I have used the Three Little Angels stamp from LOTV.


Click on image to enlarge picture

 I cur the cardstock to 5 x 7. After stamping the image I diecut it with Spellbinders Marvellous Squares. I coloured it with Promarkers and then added some stickles to the dresses. I computer generated the sentiment and diecut it with the smallest of the Resplendant Rectangles dies. The poinsettias are Marianne Creatables. I need to do something about the glitter. It looks better in real life but could be better. The backing papers are from my stash from years ago (I am determined that I will use my old stuff as much as possible) and the ribbon and gems are from my stash.

Well that's another one down, only about eighty to go!!

Have a great day everybody.  Love and hugs from Christine x


Monday 5 November 2012

Triangular Box

Good morning friends. What happened to the weekend - now you see it, now you don't and it's Monday again already.  I was trawling through blogland and came across this tutorial  for an incredibly easy box which can be found HERE and I thought you might be interested.  You only need a piece of card 28 cms x 14 cms and it only takes a couple of minutes.  It would be ideal for small gifts and can be embellished as simply or elaborately as you wished.  I think I might be using these for my table gifts at Christmas.  By altering the size of the cardstock  you can easily make different sized boxes.  I only embellished one side on this box but you could easily do all three so I'm  going to play around with a few more.


Click on image to enlarge pictures.

Showing two sides and the ribbon fastening it.


Showing the side opening with some goodies inside.
I used pink spotted card and decorated the edges with paper lace that I bought absolutely ages ago from Lakeland before they stopped selling crafty stuff. What I hadn't realised is that it is self adhesive and when you remove the backing it is exactly the same as the paper lace so can be used too. Not bad since I came across it by chance when I was going through a box of stuff that had been in the back of a cupboard for a couple of years. Sorry, I'm waffling! Back to the box. I added a WOC gardenia and a couple of pink and cream roses from my stash but I don't know where I bought them from, and Spellbinders foliage. The triangle ties with a ribbon and the whole of one side opens to allow you to put in the gift or sweets or whatever.

Well that's  it for today.

Sunday 4 November 2012

My Stocking's Already Full!

Hi  everybody, another Christmas card today.  Help!! I am starting to panic!! 

Click on image to enlarge picture


Another of these really cute LOTV images which I just love! Diecut with Spellbinders standard circles and scalloped circles, coloured with promarkers, glitter to the stocking tops and hat bobbles and dotted with liquid pearls for snow. I used a glitter glue pen on the actual stocking but it looks more effective in real life than in the picture. Once again I removed the yellow centres from the poinsettias and replaced them with a glittered sun punch out. The sentiment stamp was a magazine freebie and the background papers are Papermania Home For Christmas.  Red pearls are from Hobbycrafts. Quite a simple, clean-looking card really.

Well as you can see I am back into my crafting again. Let's hope nothing crops up over the next few days and I can get some Christmas cards made.

Have a good day everybody.

Love from Christine x

Saturday 3 November 2012

New Home

Hello blog friends. Sorry about the confusion yesterday if you were trying to see this  post. As I scheduled it I had a senior moment and clicked on the wrong date and it published immediately. Ouch!  I'm sure there must be a way to rectify it but I couldn't find it, so in the end I just deleted  it and started again. Maybe one of you cleverer people knows the answer?

This is a card for my nephew who has just moved into his new home.

Click on image to enlarge card


Linda (Lindyloo) did a similar layout to this a few months ago on her blog Creative Harmony, which is where I remembered it from.  However, Linda's was beautifully feminine.  I used browns and blues and straight lines to maintain the masculine theme, and added a blue butterfly for a touch of whimsy.  Okay, I know the blue bow isn't so masculine but it's only a small one so I think I can be forgiven.  I computer generated the sentiment then used Spellbinders classic ovals to diecut the sentiment and co-ordinating mat.

Well that's it for me today. Hope you all have a good day and manage to find some time to craft.

With love from Christine xx


Friday 2 November 2012

The Happy Couple

As I said, I have been so busy and not much time to craft  - sob! sob!  I made this card a couple of months ago but haven't shown it so I thought this was a good opportunity.

Click on image to enlarge picture.


It is actually a stepper card but unfortunately I had to scan it rather than photograph it so you cannot see the step effect. I used white card stock to cut the stepper base using my hougie board, and matted it with pink pearlescent paper. The pink backing papers are from a  wedding scrapbook pad, which I think might be Hot Off The Press. There are some very pretty green papers in it which I will be using at some stage because they don't look like wedding papers. The image is an LOTV topper with some glitter added to the flowers and the brides gown, although not visible, Spellbinders lacy circle and two layers of pink pearlescent card using Martha Stewart  double loop punch. The flowers, pearls and ribbon are from my stash.

My new printer came yesterday so it is all set up and ready to go. Here's hoping that it serves me as well as my last one which I had for eleven years with no problems at all. Mind you, nothing is made to last these days so it's doubtful!

Well have a good day everyone.  Christine xx


Thursday 1 November 2012

Flower and Swirls

Good morning. I've been pretty busy and not had much time to craft. I did manage to make a very simple card which I thought I would show, made mostly from my bits box.


Click on image to enlarge picture.


I stamped a swirls stamp in versamark onto  a scrap of pink pearlescent paper and embossed it with white powder and mounted it onto silver mirri. The flower is just a couple of punched flowers and two punched maple leaves in green vellum.  I mounted it onto pink pearlescent cardstock and then used liquid pearls.  Very simple indeed.

Well I hope you all have a good day.

Love from Christine xx